Fuel Your Day: The Ultimate Guide to Affordable & Healthy Homemade Granola Bars for Meal Prep
In our fast-paced world, convenience often comes at a cost – both to our wallets and our health. The allure of store-bought snacks is undeniable, but what if you could create something equally convenient, far more nutritious, and significantly more affordable right in your own kitchen? Enter the humble but mighty
homemade granola bar. These versatile, chewy delights are not just a snack; they're a smart meal prep solution, a lunchbox hero, and a testament to the fact that healthy eating doesn't have to be complicated or expensive. Forget those crumbly, overly sweet, or rock-hard disappointments; we're about to unlock the secrets to perfect, clean-cut granola bars that hold together beautifully and taste incredible, all while giving you complete control over your ingredients.
The Unbeatable Benefits of Homemade Granola Bars
Deciding to make your own snacks, especially something as commonplace as a granola bar, might seem like an extra step in an already busy schedule. However, the benefits of crafting your own
homemade granola bars far outweigh the minimal effort involved, transforming your approach to healthy eating and meal planning.
*
Exceptional Affordability: Think about the cost of a single store-bought granola bar. Now imagine buying oats, peanut butter, and honey in bulk. The difference is staggering. Crafting your own bars from pantry staples drastically reduces the per-serving cost, allowing you to stretch your grocery budget further without sacrificing quality or nutrition. It’s an investment in ingredients that pays dividends in delicious, economical snacks.
*
Complete Ingredient Control: One of the most compelling reasons to go homemade is knowing exactly what you're putting into your body and your family's. Commercial granola bars often hide high fructose corn syrup, artificial flavors, and preservatives. With a
homemade granola bar recipe, you choose pure, wholesome ingredients, regulating sugar content and avoiding unwanted additives. This transparency is invaluable, especially for those with dietary restrictions or allergies.
*
Effortless Convenience for Meal Prep: The beauty of a no-bake granola bar lies in its sheer simplicity and suitability for meal prep. A single batch can yield a week's worth of grab-and-go snacks, transforming chaotic mornings into smooth transitions. Perfect for tossing into lunchboxes, packing for a post-workout refuel, or stashing in your bag for an afternoon energy boost, these bars epitomize convenient healthy eating. They take minutes to prepare, then just chill and slice, making them a cornerstone of any effective meal prep strategy.
*
Endless Customization and Flavor Fun: While the base recipe for
homemade granola bars is wonderfully simple, it serves as a blank canvas for culinary creativity. From adding your favorite nuts and seeds to incorporating dried fruits or a sprinkle of warming spices, the possibilities are virtually limitless. This means you can tailor flavors to individual preferences, keeping snack time exciting and varied.
*
The Joy of Creation: There’s a unique satisfaction that comes from creating something wholesome and delicious from scratch. It’s an empowering feeling to provide nutritious options for yourself and your loved ones, transforming simple ingredients into a beloved staple. This sense of accomplishment can even inspire kids to get involved, making snack prep a fun family activity. For more on creating delicious, kid-friendly versions, check out our guide on
Homemade Granola Bars: Chewy, No-Bake & Kid-Friendly.
Unlocking the Secret to Perfectly Chewy Homemade Granola Bars
Many home bakers have faced the disappointment of a well-intentioned batch of granola bars that either crumble into expensive trail mix or harden into unappetizing bricks. The key to achieving that ideal chewy texture and clean slice isn't necessarily a secret ingredient; it's a careful balance and precise technique. As detailed in resources like
The Secret to Perfectly Chewy Homemade Granola Bars, understanding the 'why' behind each step is as important as the 'what.'
The Critical Wet-to-Dry Ratio
The most common pitfall in
homemade granola bar recipes is an incorrect wet-to-dry ratio. Too much dry ingredient (oats, add-ins) and not enough wet binder leads to a crumbly mess. Too much wet ingredient can result in a sticky, overly dense bar that never truly sets. The goal is a mixture that is thoroughly moistened but still holds its shape when pressed. This balance ensures that your bars remain chewy for days without becoming hard or falling apart. Pay close attention to the recipe's specified amounts for oats, nut butter, and liquid sweeteners like honey or syrup, as these are the core components determining your ratio. If your mixture feels too dry, add a tiny bit more binder (nut butter or honey) until it comes together.
The Power of the Pressing Technique
Once your ingredients are perfectly mixed, how you press them into the pan makes all the difference. Many recipes overlook this crucial step. Simply spreading the mixture lightly won't create cohesive bars. You need to press it firmly and evenly into your dish. Using the flat bottom of a measuring cup, a metal spatula, or even your hands, apply considerable pressure across the entire surface. This compaction eliminates air pockets and creates a dense, interlocked matrix of ingredients that will bind together beautifully once chilled. The firmer you press, the more solid and sliceable your bars will be, without turning into an unpleasantly hard texture, provided your wet-to-dry ratio is correct.
Essential Pantry Staples for Your Granola Bar Base
The foundation of great
homemade granola bars lies in a few simple, accessible ingredients. Understanding their roles helps in customizing and troubleshooting.
*
Oats: The star of the show.
Quick-cooking oats are often preferred for their ability to create a softer, chewier bar that binds more easily. However,
old-fashioned rolled oats can also be used; they will yield a slightly chewier, more textured bar. If using old-fashioned, ensure your wet ingredients are adequately binding, and consider letting the mixture sit for 5-10 minutes before pressing to allow the oats to absorb some moisture.
*
Nut Butter: This is your primary protein source and a vital binder.
Creamy peanut butter is a classic choice, providing excellent cohesion and a rich flavor. Feel free to use natural peanut butter or other nut butters like almond butter or cashew butter. For those with nut allergies, sunflower seed butter (sunbutter) works wonderfully. Crunchy varieties can be used but might slightly alter the bar's overall texture. Ensure it's well-mixed into the base.
*
Honey/Liquid Sweetener: Honey is indispensable for both its natural sweetness and its incredible binding properties. Its sticky nature is what helps hold everything together, contributing significantly to the bars' chewy texture. Maple syrup is an excellent vegan alternative that provides a similar binding quality and depth of flavor. Brown sugar can also be added for extra caramel notes and to help keep the bars soft.
*
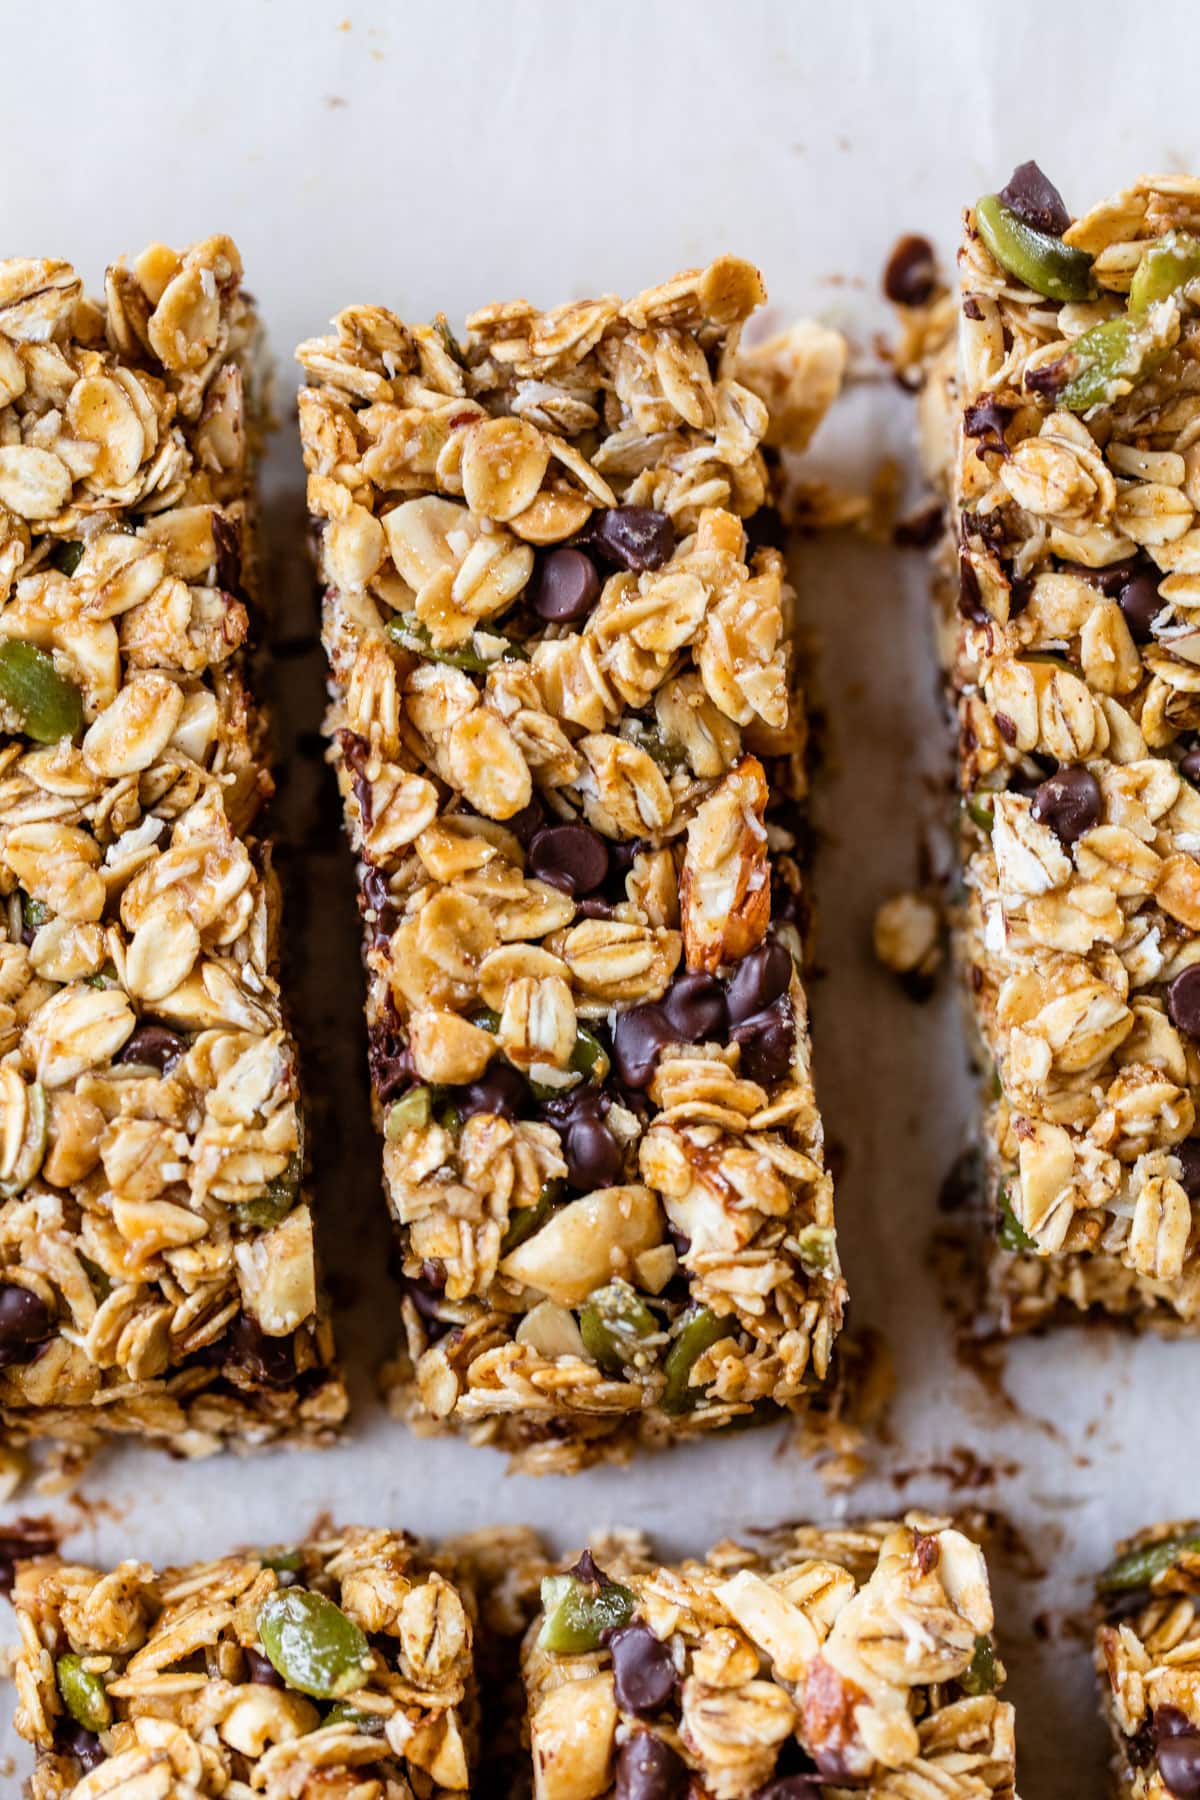
Mini Chocolate Chips: While optional, mini chocolate chips are a fantastic addition, melting slightly to create pockets of gooey goodness. The "mini" size is important because larger chunks can compromise the structural integrity of the bars, making them more prone to crumbling during slicing. You can also chop up a larger chocolate bar finely if minis aren't available, or swap for mini M&Ms for a fun twist.
Beyond the Basics: Creative Add-Ins & Flavor Variations
Once you've mastered the foundational recipe for
homemade granola bars, the real fun begins with customization. The beauty of making your own is the freedom to infuse them with your favorite flavors and boost their nutritional profile. Just remember the golden rule: keep the total amount of extra add-ins to around 1/2 to 3/4 cup per batch to ensure the mixture still binds effectively.
Here are some inspiring ideas to elevate your granola bars:
*
Nuts & Seeds: Incorporate chopped almonds, walnuts, pecans, or pistachios for healthy fats, protein, and satisfying crunch. Seeds like chia, flax, pumpkin (pepitas), or sunflower seeds add Omega-3s, fiber, and diverse textures. Toasted nuts and seeds offer an even deeper flavor profile.
*
Dried Fruits: Introduce natural sweetness and chewiness with dried cranberries, cherries, apricots (chopped), raisins, dates (pitted and chopped), or shredded coconut. These add a burst of flavor and a dose of antioxidants.
*
Spices & Extracts: A pinch of cinnamon, nutmeg, or even a dash of cardamom can transform the flavor. A splash of vanilla extract or almond extract can also enhance the overall taste.
*
Different Chocolates & Candies: Beyond mini chocolate chips, consider white chocolate chips, dark chocolate chunks (finely chopped), or cacao nibs for a less sweet, more intense chocolate flavor. For a fun, occasional treat, a handful of mini M&Ms can be a hit, especially with younger snackers.
*
Protein Boosters: A tablespoon or two of protein powder (unflavored or vanilla works best) can be mixed in for an extra punch, though you might need to slightly adjust the wet ingredients to maintain consistency.
These additions not only make your
homemade granola bars more exciting but also significantly enhance their nutritional value, providing a broader spectrum of vitamins, minerals, fiber, and healthy fats.
Mastering Your Homemade Granola Bar Meal Prep Strategy
Turning your kitchen into a granola bar factory for meal prep is simpler than you think. The goal is efficiency and consistency, ensuring you always have a wholesome snack on hand.
Simplified Step-by-Step Overview:
1.
Melt & Mix Wet Ingredients: Gently warm your nut butter, honey/syrup, and any optional brown sugar together until smooth and cohesive. This helps the ingredients blend seamlessly and creates a better binder.
2.
Combine Dry Ingredients: In a large bowl, mix your oats and any chosen add-ins.
3.
Integrate Wet & Dry: Pour the warm wet mixture over the dry ingredients and stir thoroughly until everything is evenly coated.
4.
Press Firmly: Transfer the mixture to a parchment-lined baking dish (8x8 or 9x13, depending on desired thickness). Using the bottom of a measuring cup or a sturdy spatula, press the mixture down *very firmly* and evenly across the entire surface. This is perhaps the most critical step for structural integrity.
5.
Chill to Perfection: Place the pressed mixture in the freezer for at least 30-60 minutes, or in the refrigerator for 2-3 hours. This firm chill is essential for clean, non-crumbly cuts.
6.
Slice & Store: Once thoroughly chilled and firm, lift the parchment paper to remove the slab from the pan. Use a sharp knife to cut into your desired bar size.
Critical Pro Tips for Granola Bar Success:
*
Patience is a Virtue (Especially with Chilling): It’s tempting to cut into your bars early, but resist! The only way to guarantee sturdy, clean-cut bars that don't crumble is to give them ample time to set in the freezer or fridge. A well-chilled bar slices like a dream.
*
The Right Pressure Matters: Don’t just pat the mixture down. Lean into it! The more firmly and evenly you press the oat mixture into the pan, the better your bars will hold their shape.
*
Troubleshooting Binding Issues: If, after mixing, your granola bar mixture seems too dry or isn't coming together, add another tablespoon of honey or nut butter. Mix well and re-evaluate. It’s easier to add a little more than to fix an overly wet mixture.
*
Consistent Meal Prep Rhythm: Make
homemade granola bars a regular feature in your weekly meal prep routine. Even if you haven't finished the previous batch, start a new one. This ensures you always have a ready supply of these good-for-you snacks, preventing you from reaching for less healthy alternatives when hunger strikes.
*
Optimal Storage: Store your finished granola bars in an airtight container at room temperature for up to a week. For longer storage, they can be kept in the refrigerator for two weeks or individually wrapped and frozen for up to three months. Thaw frozen bars at room temperature for a quick, healthy snack.
Conclusion
Embracing
homemade granola bars for your meal prep is a game-changer. It's an accessible path to healthier eating, offering significant savings, complete control over ingredients, and the unparalleled satisfaction of creating something nourishing with your own hands. By understanding the simple secrets of wet-to-dry ratios, effective pressing, and smart ingredient choices, you can consistently produce perfectly chewy, delicious bars that rival any store-bought option. Make them a staple in your kitchen, customize them to your heart's content, and enjoy the convenience and peace of mind that comes with always having a healthy, affordable snack at your fingertips. Take granola bars permanently off your grocery list and welcome them into your homemade meal prep rotation – your taste buds and your wallet will thank you.